


This guide walks you through the entire journey — joining Medverse as a partner, registering your products and services, and getting them in front of verified healthcare professionals — laid out step by step with actual screenshots.
It flows as a single sequence: signing up, verifying your phone number and business, entering your company information, registering a service, promoting it through the community feed and group chats, and finally getting listed on Partners. If you follow along from the very beginning, you'll be able to complete everything through the partner application without needing any separate instructions.
Here we use a tax accountant signing up as the example. A tax accountant lists tax and tax-saving services, a labor consultant lists labor services, a medical device company lists products — any professional service or business simply follows the exact same sequence. Just picture your own field in place of the tax accountant on screen.
If you're not yet familiar with what Medverse is, read Looking for Partners to Build Medverse With — The Platform Where Verified Medical Professionals and the Healthcare Industry Come Together Once you understand why we built this platform and what it's for, each of the steps below will make far more sense. You can also refer to How It Works and the FAQ.
Why We Made This Guide
We created this guide to help those who will join us as Medverse Partners — our affiliate companies. Signing up, registering products and services, and getting listed on Partners are all free. There is no charge for registration or exposure.
Following this process from start to finish isn't necessarily easy the first time. You'll go through verification, and there are several fields to fill in. Even so, if you trust what we do and give us your time, we'll put just as much effort into promoting you. The products and services you register are shared by us directly — through email and app notifications sent to members who have opted in, and through our official channels, group chats, and community. This, too, comes at no cost.
That said, Partner spots aren't filled by just anyone. We give priority to companies we've had good results with, those suggested by trusted acquaintances, and members who actively use Medverse. Think of it as our standard for building lasting relationships with verified companies.
Partner applications are always welcome. However, clearly defined professional services — such as tax, legal, patent, and law — are a little different. Products vary slightly in specs and price, so several companies can be listed side by side and each still has its place. But with these professional services, a member isn't going to line up several firms in the same field to compare and choose. That's why we operate by featuring one company per field and promoting them consistently.
For these fields, we give priority to whoever comes first. If you're interested, it's better to let us know early. There is one spot per field, and we don't leave it open for long. If you don't come now, another company or individual in the same field will eventually take that place.
You can see which companies are currently with us on the Partners page, and the full list of businesses registered on Medverse on the Businesses page.
What to Prepare
Prepare Your Logo Image
Before you begin signing up, prepare the logo image for your profile. A square image fits most cleanly.
A simple, trustworthy emblem is enough. This logo will appear throughout your profile and service cards, so choose one that's easy to recognize at a glance.

Prepare a Featured Image for Your Service
Also prepare the featured image for the service you'll register. A landscape (horizontal) image fits well on service cards and previews.
Matching the color and mood of your logo makes your whole profile look like one coherent set, giving a much more polished impression.

Step 1. Sign Up
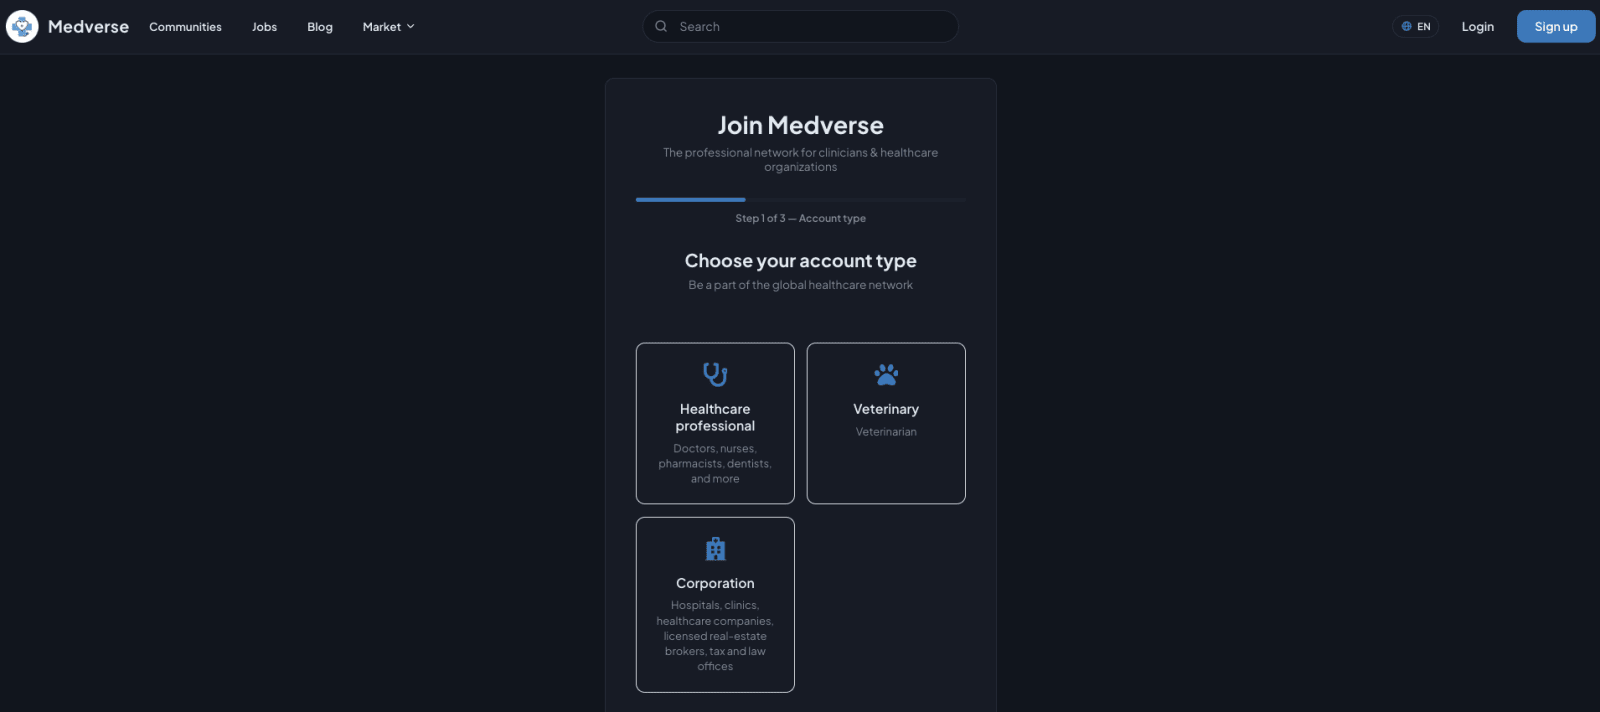
Choose Your Account Type
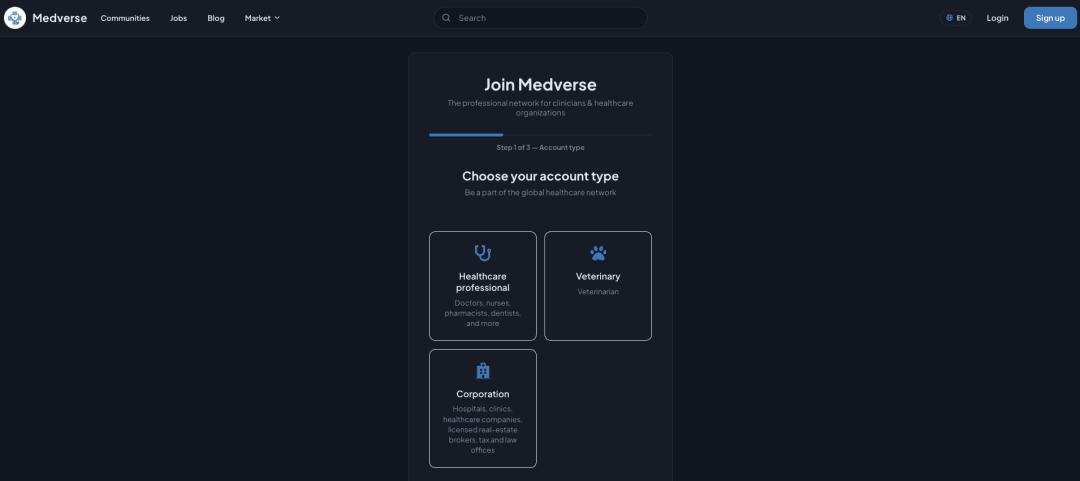
Click Sign Up to begin. On the first screen, choose your account type. You'll select from Healthcare Professional, Veterinary, Business, or General. Since you're joining as a business, select Business.
The Business category includes hospitals, clinics, medical-related companies, licensed real estate agents, tax accountants, judicial scriveners, labor consultants, law offices, and more.
Choose Your Business Type
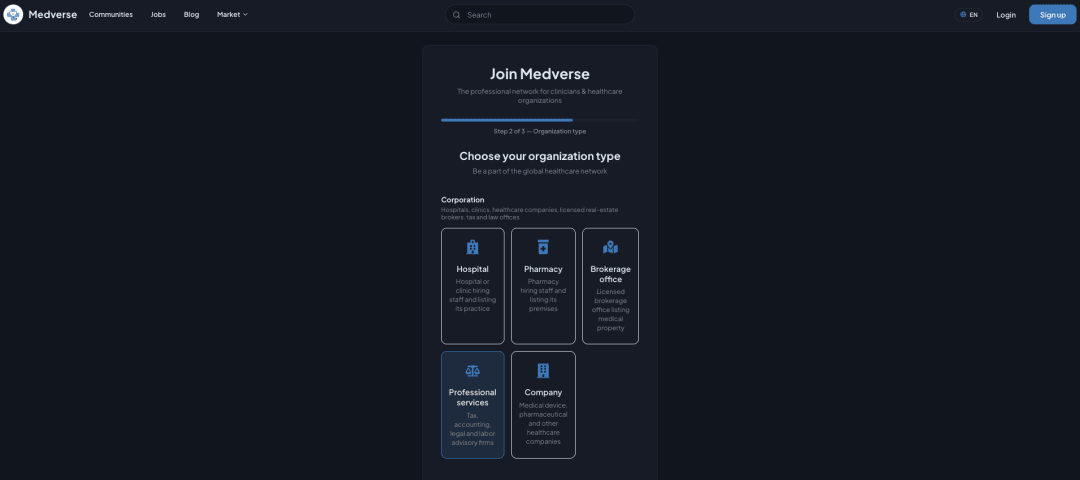
Next, choose your detailed business type. Select from Hospital, Pharmacy, Real Estate Office, Professional Services, or Company.
A tax firm falls under Professional Services, so select Professional Services. This category includes tax accountants, certified public accountants, judicial scriveners, labor consultants, and law offices.
Enter Your Account Information
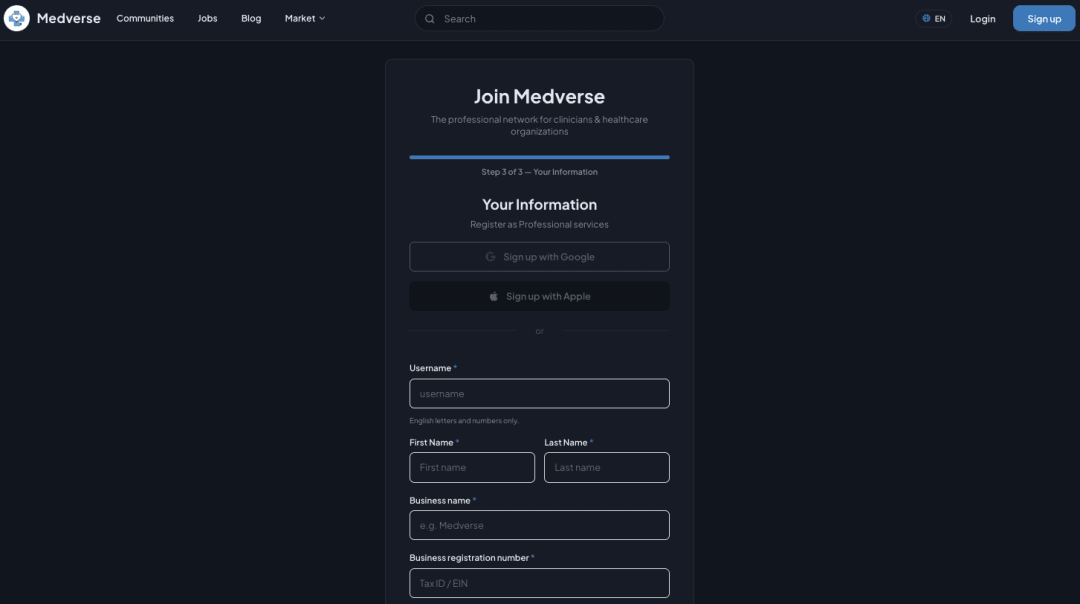
Finally, enter your account information. You can sign up quickly with your Google or Apple account, or enter your details directly.
Enter your username, first and last name, business name, and business registration number. The username may contain only letters and numbers. In this example, we used taxaccountant as the username and Tax Firm as the business name.
If you already have an account, just head to Log In.
Step 2. Verification
You can revisit and continue verification anytime from the Verification tab in Settings.
Phone Number Verification
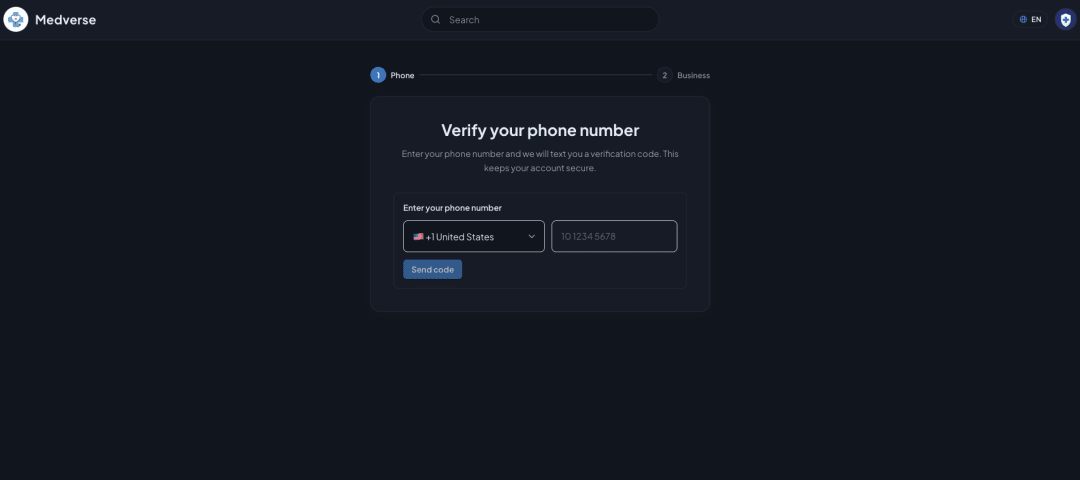
After signing up, you move on to identity verification. Confirm your country code e.g., +1 for USA, enter your mobile number, and press Send Code — a verification code will arrive by text.
Phone verification keeps your account secure and filters things so that only real users get in.
Business Verification
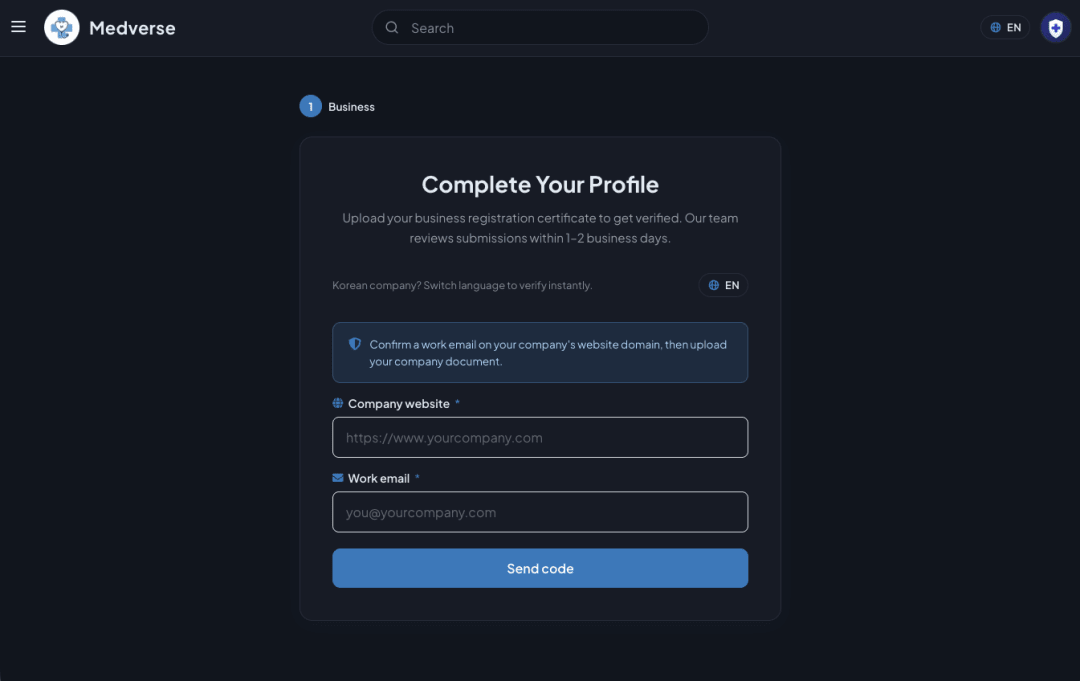
Next is business verification. On the Complete Your Profile screen, international companies verify in two steps: first confirm a work email on your company's website domain, then upload a government-issued business document.
Enter your Company website and a Work email on that same domain, then press Send code. A verification code is sent to that address — enter it to confirm the email belongs to your company. Once your email is confirmed, upload your business registration certificate (or an equivalent government-issued company document). Our team reviews submissions within 1–2 business days.
The information you submit is used solely for verification purposes and is not disclosed externally. If you're a Korean company, use the language toggle to switch to KO and you can verify instantly instead.
Step 3. Initial Setup
Getting Started Guide
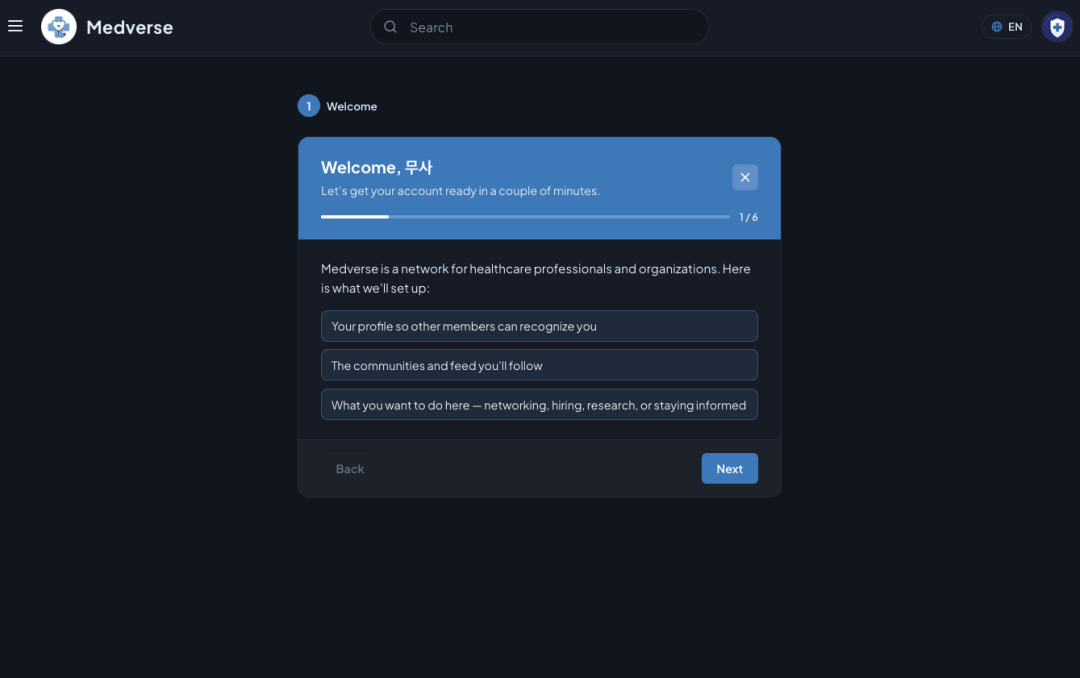
Once verification is complete, an initial setup guide begins to help you get your account ready. You'll set up your profile, the communities and feeds you'll join, and your purpose of use, in order. For purpose of use, you can choose from Networking, Hiring, Research, or Information Gathering.
Press Next and follow the guide, and your setup is done in one pass. If you stop partway through, you can pick up again at Complete Your Profile.
Introduce Yourself in official communities
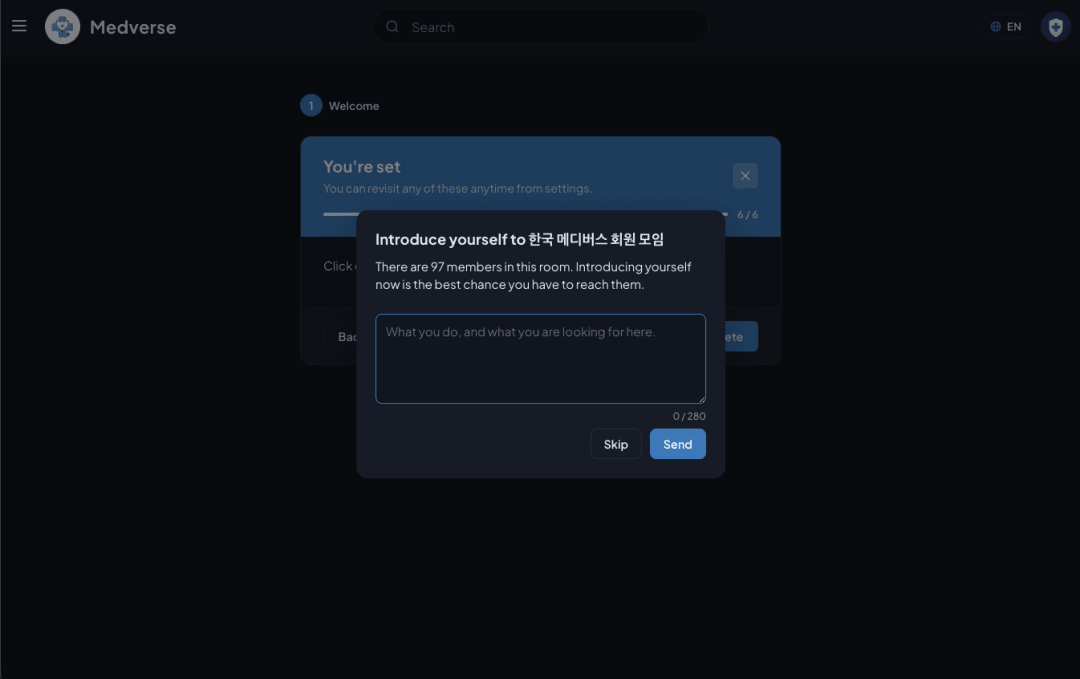
During the sign-up process, you can leave a self-introduction in official members group chat. Since other members are already gathered there, saying hello is a great starting point for promoting your products and services.
For a tax partner, for example, write a short, credible note about what you help with — from startup tax and bookkeeping to income tax and VAT filing and tax-saving consultations.
You can find other public chat rooms to join under Discover Chats.
Introduction Sent
Once you press Send, your introduction is posted to the chat room. Members nationwide can see it immediately, and it comes with a mobile notification, so you're promoted nationwide the moment you sign up.

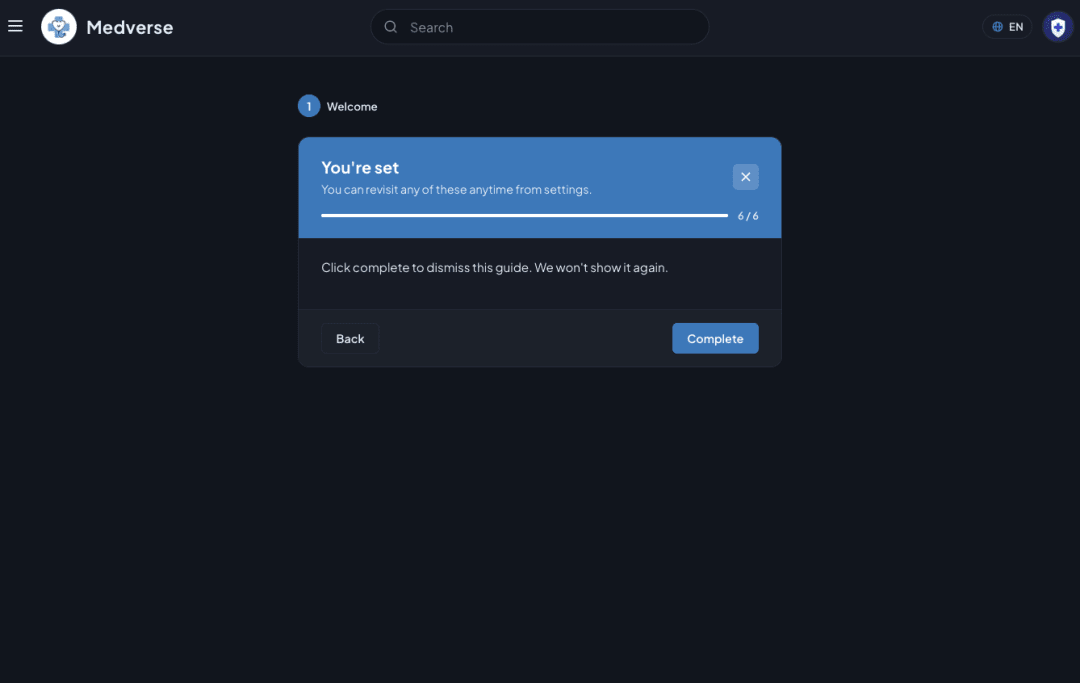
Initial Setup Complete
Once you end the final step of the guide, your account is ready. Now you move on to filling in your profile and company information and registering a service.
Step 4. Profile and Company Information
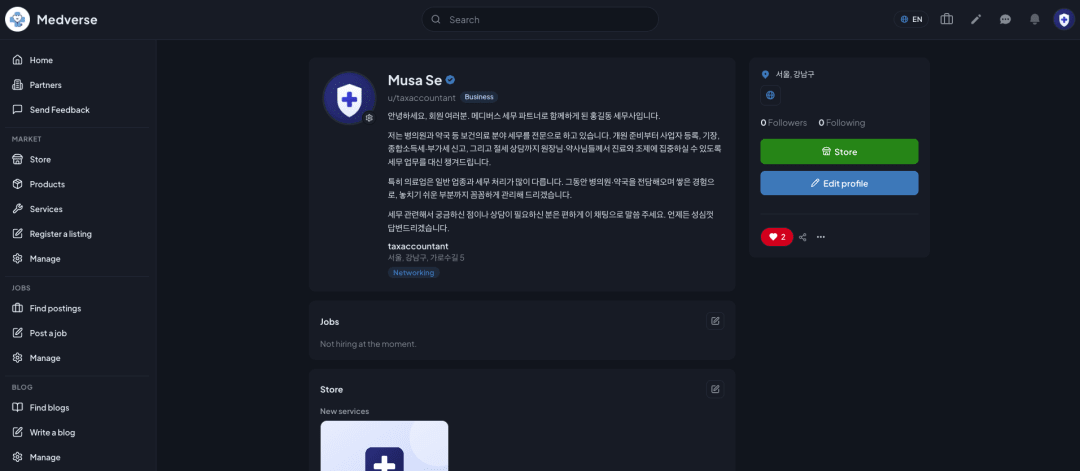
Review Your Profile
This is your profile screen. Along with your logo, name, and business name, you'll see fields for business information, hiring, store, and weekly working hours.
Use the Complete Your Profile button to fill in details visitors will see, such as industry classification, address, and contact information.
Enter Your Business Profile Information
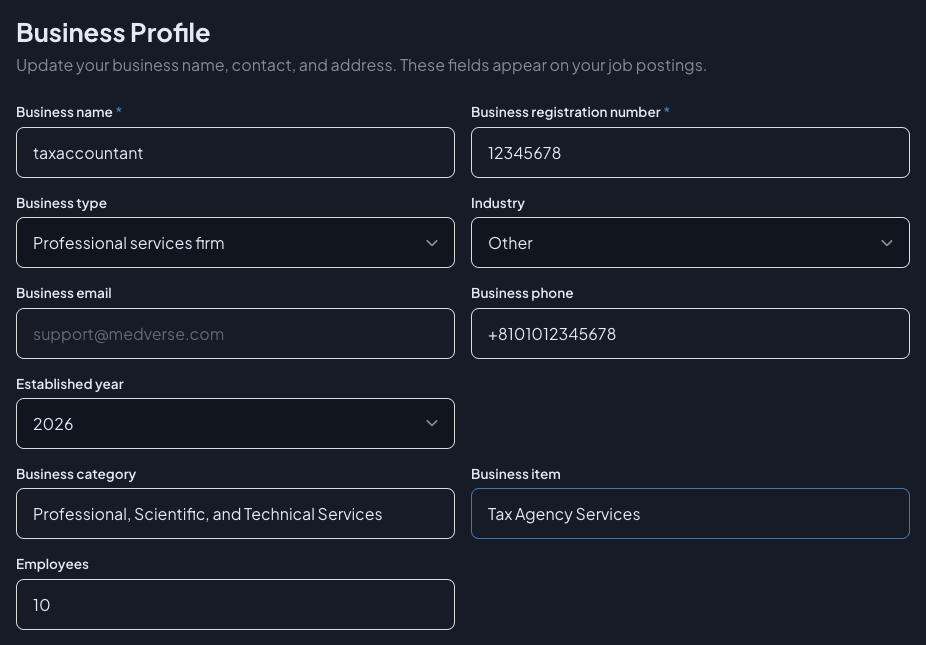
In the Business tab in Settings, enter your business name, business registration number, business type, industry classification, email, phone number, year established, and business category and item.
For a tax firm, set the business category as Professional, Scientific, and Technical Services and the item as Tax Agency Services. This information is also displayed when you post Job Listings.
Enter Your Business Address
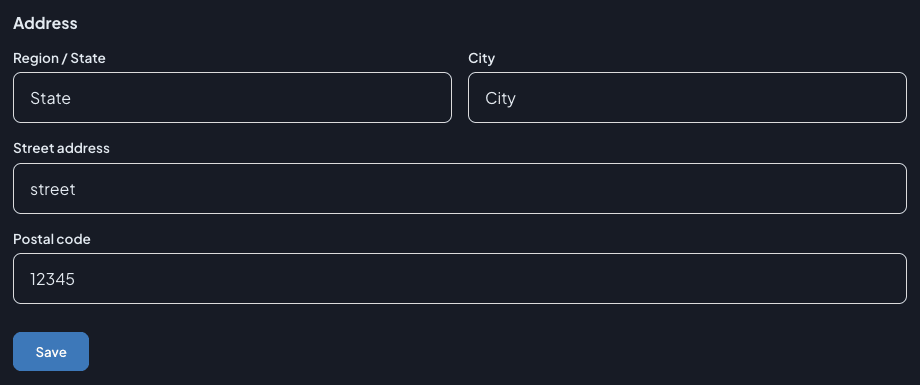
On the same screen, enter your business address. Having an address lets visitors check your location, which increases trust.
Edit Your Profile
In the Profile tab in Settings, you can fill in your profile photo, first and last name, website, GitHub, LinkedIn, YouTube, Instagram, an introduction video, your purpose, and more.
The more links you add, the richer your profile looks, and the more visitors will trust you.
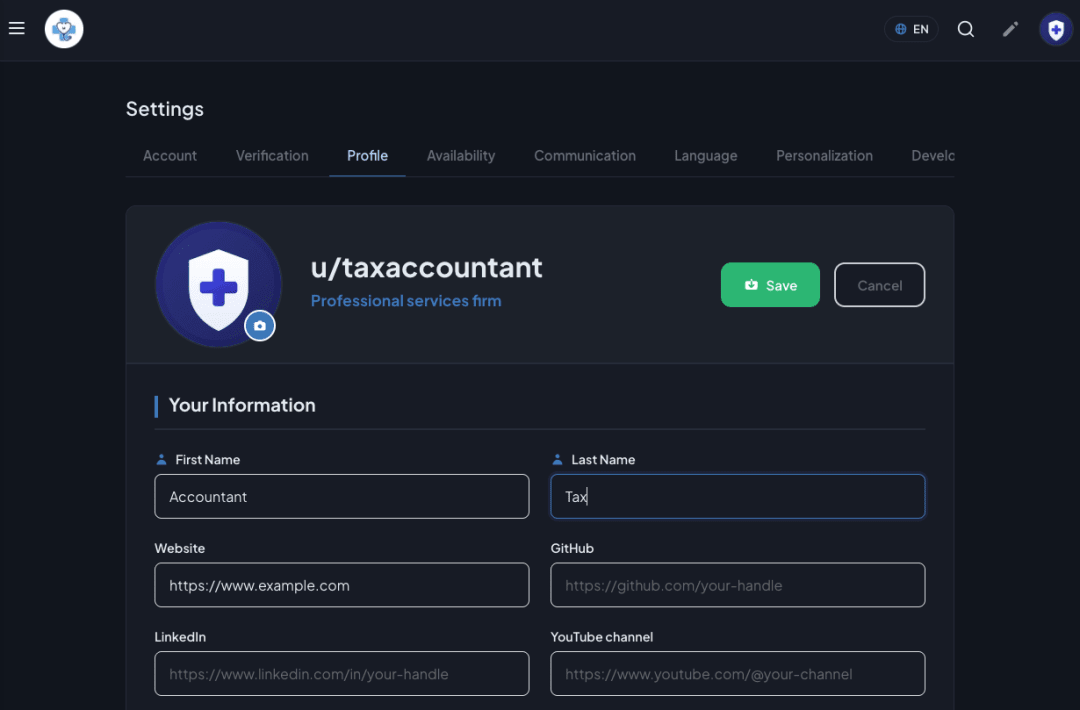
Save Your Profile
Once you complete entering your information, press Save to apply it. Non-required fields can be filled in later, so it's fine to enter just the basic information first and move on.
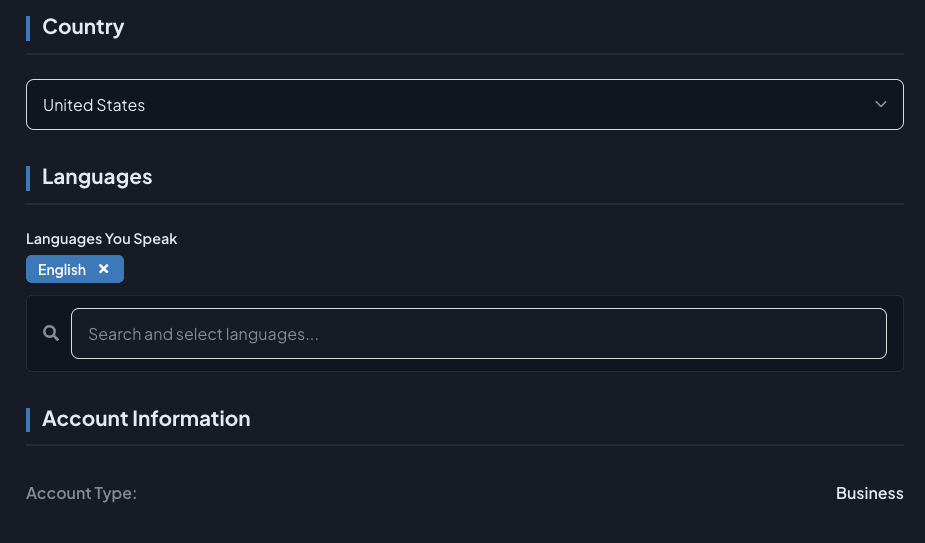
Step 5. Weekly Working Hours
Set Your Working Hours
In the Availability tab in Settings, set your available hours by day of the week. You can specify them easily with All Day and Day Off toggles, and days you don't set won't appear on your public profile.
Showing when you're reachable makes it easy for members who want a consultation to contact you without hesitation.
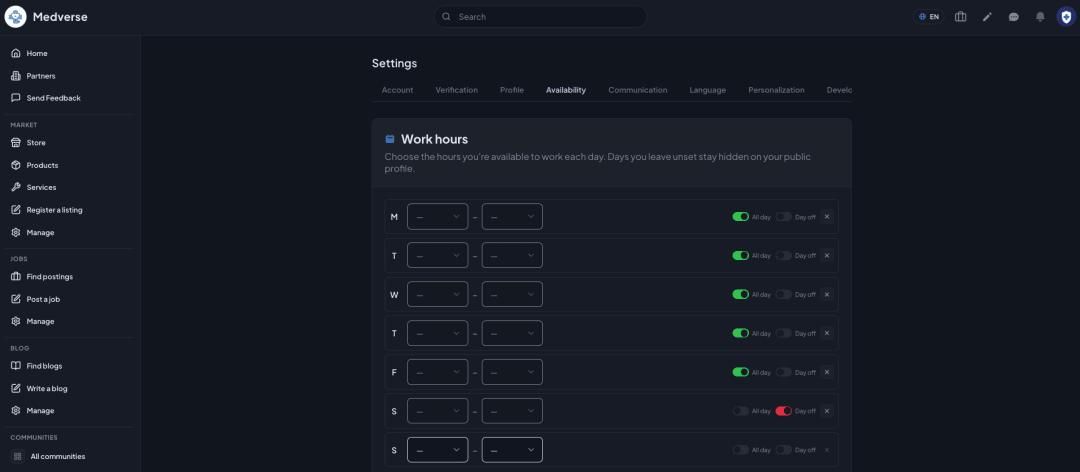
Preview Your Working Hours
Use the preview to check how your working hours actually appear. Give it a quick look to make sure there are no wrong days or times before moving on.
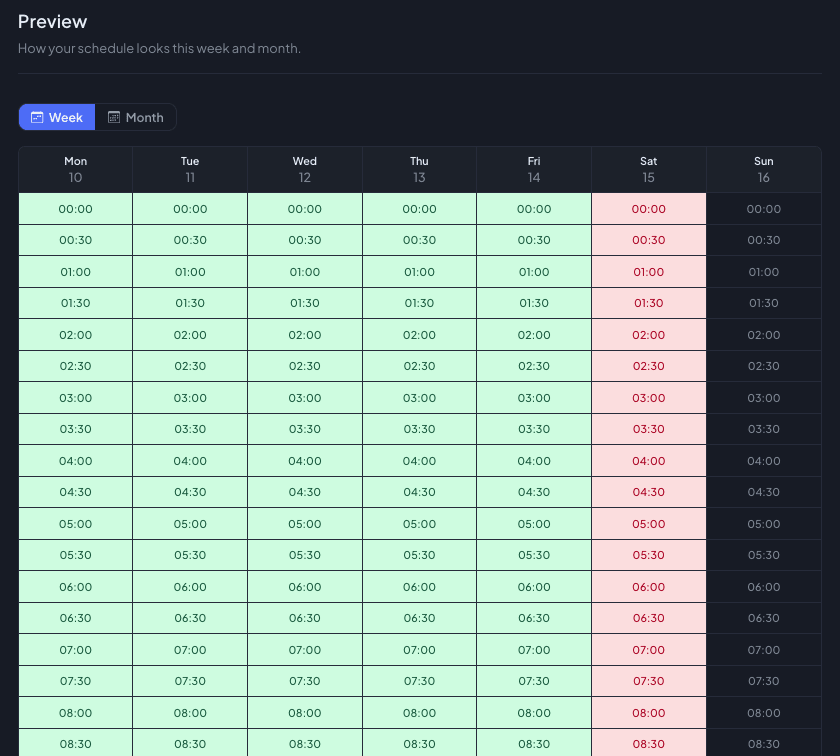
Step 6. Your Public Profile
Review Your Public Profile
Based on the information you've filled in, your profile goes public. Once you reach this step, the profile that others will see when they search for or visit you is complete.
Your Completed Public Profile
This is your completed public profile, showing your company introduction, location, and website. Now you can add your actual products and services on top of it.
Your public profile address takes the form https://www.medverse.com/user/username, and your store can be viewed separately at https://www.medverse.com/user/username/store. For example, our operations account's profile is https://www.medverse.com/user/support.

Step 7. Register a Service
Open Manage My Listings
From Register or Manage in the left menu, go to Manage My Listings. If you haven't registered anything yet, you'll see a Register Your First Listing button.
Here you can register and manage real estate, products, and services. You can also open each registration screen directly at the addresses below.
Register a service: https://www.medverse.com/marketplace/new?type=SERVICE
Register a product: https://www.medverse.com/marketplace/new?type=PRODUCT
Register a real estate listing: https://www.medverse.com/marketplace/new?type=REAL_ESTATE

Register from Your Store
You can also start registering right from the store area of your profile. Press the Register button to add a new service.

Enter Service Information
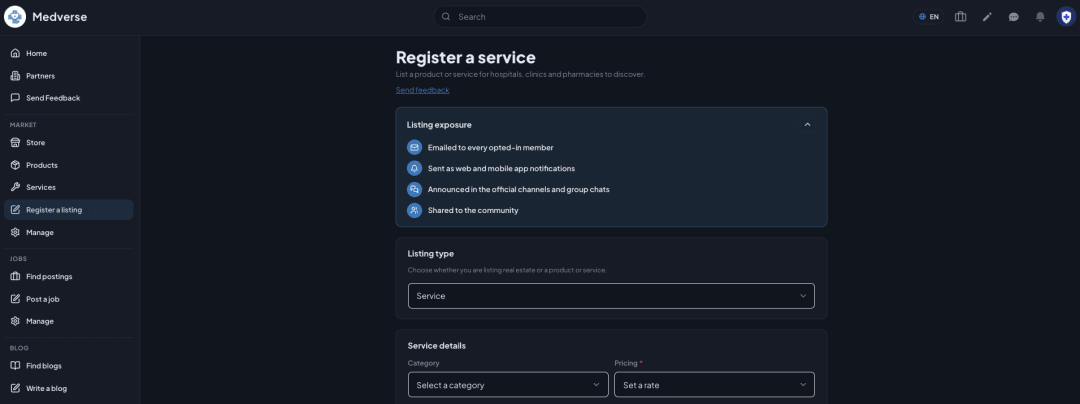
This is the service registration screen. Choose Service as the listing type, then enter the category, price, and details. Upload the featured service image you prepared earlier here as well.
As the exposure notice at the top explains, once you register a service, email and app notifications go out to members who have opted in, and it's shared to our official channels, group chats, and community too.
Service Registration Complete
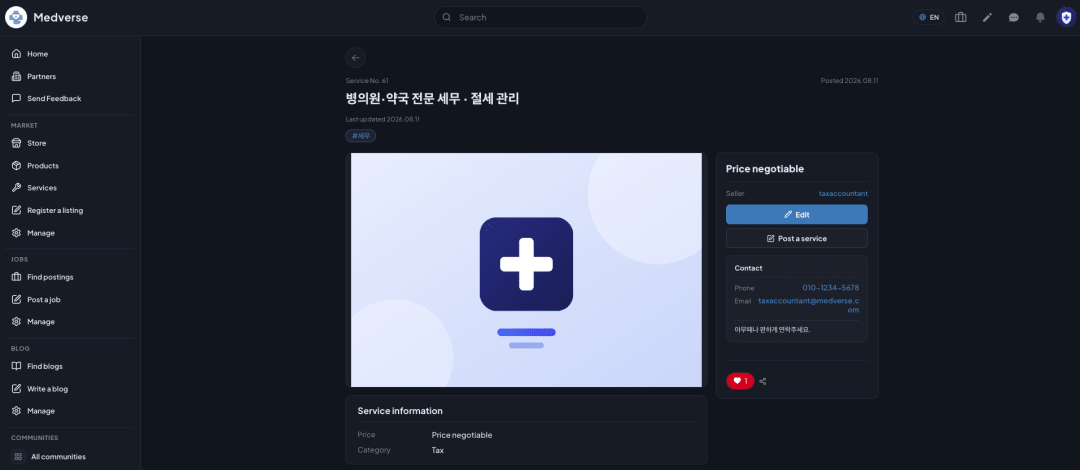
Once registration is done, a service detail page is created. The title, featured image, tags, contact information, and Like and Share buttons are all displayed. In this example, we set the title to Tax and Tax-Saving Management for Clinics and Pharmacies and the tag to #Tax.
The service detail page address takes the form https://www.medverse.com/marketplace/service/listingnumber. For products it's https://www.medverse.com/marketplace/product/listingnumber, and for real estate listings, https://www.medverse.com/marketplace/realestate/listingnumber. This address is the link you'll use for promotion going forward.
A Price Negotiable indicator and the information to contact are shown together, so interested members can reach out right away.
It Also Appears on Your Store Page
The service you register is automatically added to the store area of your profile as well. A service card appears below your company introduction, so visitors can see what services you offer at a glance just by viewing your profile.
It's effectively shown in several places within Medverse at once, so a single registration promotes you across your profile, the products and services listings, and the community.

Appearing in the Service Listings
Here's your service listed as a card in the products and services listings. It appears alongside other members' services, with its Like count shown too.
Members can find the services they want using the category and sort filters, so simply having it registered keeps you steadily visible. You can view the listings below.
All products and services: https://www.medverse.com/marketplace?type=CATALOG
Services only: https://www.medverse.com/marketplace?type=SERVICE
Products only: https://www.medverse.com/marketplace?type=PRODUCT
Real estate listings: https://www.medverse.com/marketplace?type=REAL_ESTATE

Step 8. Promotion
Write a Post in the Community Feed
Now for the final promotion step. Go to Create Post and paste the address of the service you just registered as a link.
Once you add a title and the link, a card with the featured image and description is automatically generated as a preview. You can choose your community from Medverse Community and others under Explore.

Your Post Goes Up in the Feed
Here's your post published to the Main Feed. It's shown to other members right at the top of the home feed, and you can gather reactions through likes, comments, and shares.

Promote in the Chat Rooms Too
Finally, share your service link in chat rooms as well — members groups, official channels, and group chats. When you paste a link, it's automatically formatted into a tidy card. You can find chat rooms to join under Discover Chats.
Promoting through both the community feed and the chat rooms helps your registered service reach as many members as possible.

Step 9. Apply for Partners
Apply via Direct Chat
To apply for Partners, two things need to be in place first. Your profile must be filled in properly and completely, and at least one of your services, products, or real estate listings must be registered with accurate, factual information. We accept applications on the premise that these two things are ready.
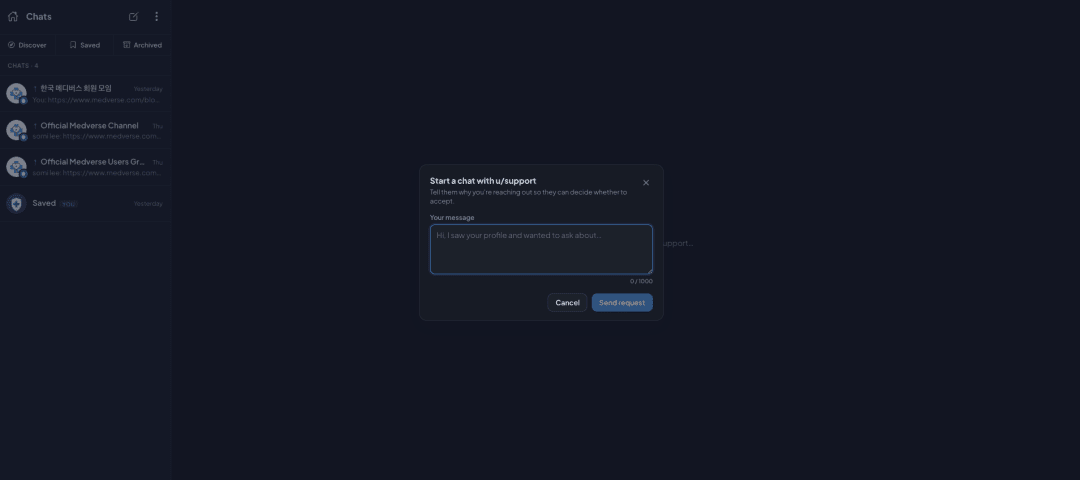
Once you're set, apply for Partners registration to our operations team via direct chat. Send a chat request to our operations account, u/support, along with a note on why you'd like to join us as a partner. You can start the conversation directly at the address below.
https://www.medverse.com/chat/thread/new/support
Partners is a spot featured in the partner listing, and it goes through review and approval by our operations team before listing. That's why the step of formally leaving an application message is necessary.
Included on the Partners Page
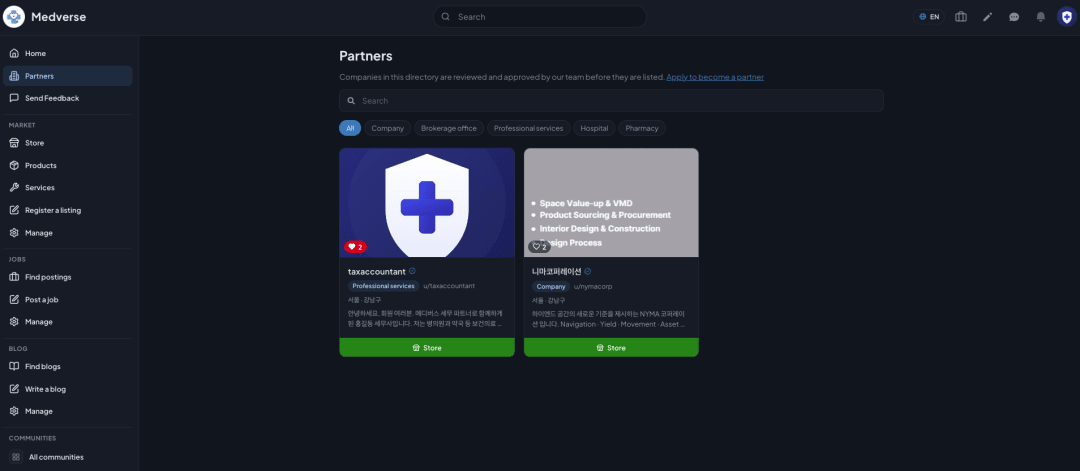
Once approved, your company is listed as a card on the Partners page. It's organized into categories — All, Companies, Real Estate Offices, Professional Services, Hospitals, and Pharmacies — so visitors can browse by field.
Being listed on the Partners page shows you as a verified company, which greatly boosts your credibility. Once you get here, you've completed a full cycle — from sign-up to service registration, promotion, and Partners listing.
We Do Other Things Too
We aren't only building Medverse. We also run Businnect, for entrepreneurs, investors, and professionals, and we're looking for people to join us there in the same way.
We're Looking for People to Join Businnect
If you'd like to be included there as well, just let us know. You won't have to redo any of the work. We'll transfer the account information, profile, and the products and services you've already entered on Medverse, so we save you the effort. You'll never have to enter the same content twice.
For inquiries, reach us via direct chat with our operations team.
Wrapping Up
Once you complete a full cycle — from sign-up to promotion and Partners listing — your registered service stays consistently visible to Medverse members. You can list multiple services, so keep filling them in following the same order.
You can find our other guides on the Medverse Blog.
다른 글

메디버스 가입부터 상품, 서비스 등록·홍보 그리고 제휴 파트너 신청까지 한 번에
이 글은 회원가입부터 전화번호와 사업자 인증, 회사 정보 입력, 서비스 등록, 커뮤니티 피드와 채팅방 홍보, 그리고 파트너스 등재까지 하나의 흐름으로 이어집니다. 여기서는 예시로 세무사가 가입하는 과정을 보여드립니다. 세무사는 세무와 절세 서비스를, 노무사는 노무 서비스를, 의료...
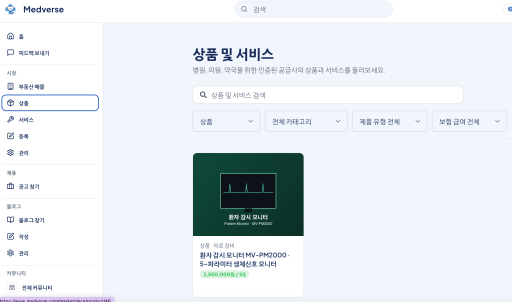
제약회사·약 도매상 필독! 의사·약사한테 직접 제품 홍보하는 법 — 메디버스 의약품 등록 완전 가이드 💊
안녕하세요! 오늘은 제약회사, 의약품 도매상, 건강기능식품 회사처럼 병원·의원·약국에 제품을 홍보하고 싶은 분들한테 딱 맞는 정보 가져왔어요. MR이 병원 일일이 방문하거나, 학회 광고 비용 쓰지 않아도 검증된 의사·약사한테 직접 제품 정보를 전달하는 방법이 있거든요. 바로 의...
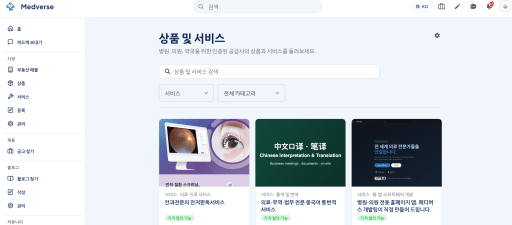
의료기기·서비스 홍보하는 법 — 메디버스 서비스 등록 가이드
안녕하세요! 오늘은 의료기기, 헬스케어 서비스, 의료 소프트웨어 등을 병원·의원·약국에 홍보하고 싶으신 분들한테 딱 맞는 정보 가져왔어요. 영업사원이 병원 일일이 방문하거나, 학회 광고 비용 쓰지 않아도 검증된 의료인한테 직접 닿는 방법이 있거든요. 바로 의료인 전용 플랫폼 메...
Medverse — the platform for every healthcare professional. Start free today at medverse.com
Why Medverse — Healthcare Isn't Done by Clinicians Alone ## Why We Started Medverse What we set out to build is simple: one place where healthcare professi...

모든 보건의료인을 위한 플랫폼, 메디버스 - 지금 medverse.com에서 무료로 시작하세요
왜 메디버스인가 — 의료는 보건의료인 혼자 하는 일이 아닙니다 ## 메디버스를 시작한 이유 저희가 만들고 싶었던 건 단순합니다. 보건의료인, 의료법인과 기관, 그리고 그들을 둘러싼 사람들 — 공인중개사부터 제약회사, 개발자까지 — 이 한자리에서 서로 소통하는 공간. 그런데 막...
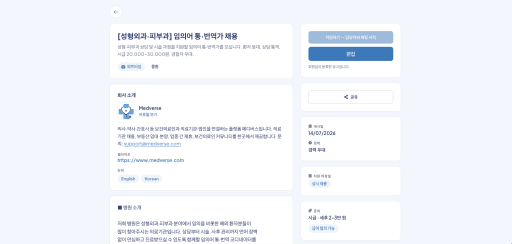
병원·의원을 위한 메디버스 통·번역 인력 채용 공고 등록 가이드
메디버스는 병원·의원·의료 관련 기업이 직접 의료 인력과 지원 인력을 채용하고, 지원자와 1:1 채팅으로 바로 연결될 수 있는 의료 채용 플랫폼입니다. 이 글은 외국인 환자 응대를 위한 통·번역 인력 채용 공고를 등록하는 과정을 순서대로 안내합니다. 원무·채용 업무를 담당하시는...